What is RCM?
In this blog, we will walk through how to set up RCM taxes in Sage X3 for purchasing transactions. By the end of this blog, you’ll be able to apply RCM taxes, record payable and input tax accounts, and ensure correct posting in your accounting system.
Under the RCM tax structure, the recipient of the goods or services is responsible for the payment of applicable taxes instead of the supplier. This is particularly relevant for GST in India and helps streamline tax compliance for transactions involving goods and services subject to this rule.
Steps for Setting up RCM in Sage X3
To properly reflect RCM taxes in your Sage X3 system, a series of configurations need to be made in the Taxes section under Common Data. Here is a step-by-step breakdown:
1) Creating BP Tax Rules
We will be using below two tax rules.
a) SCGST: For state-level GST transactions.
b) IGST: For integrated GST, often used in cross-border transactions.
2) Setting Up Tax Levels
Next, create tax levels to reflect RCM taxes. These levels will specify how the tax amounts are calculated and divided.
a) RSIG9: RCM for State 9% and Integrated 18% taxes. (This level will be used for both SCGST and IGST.)
b) RCGS9: RCM for Central 9% tax.
c) RSC18: RCM for SCGST at 18%.
d) RIG18: RCM for Integrated 18%.
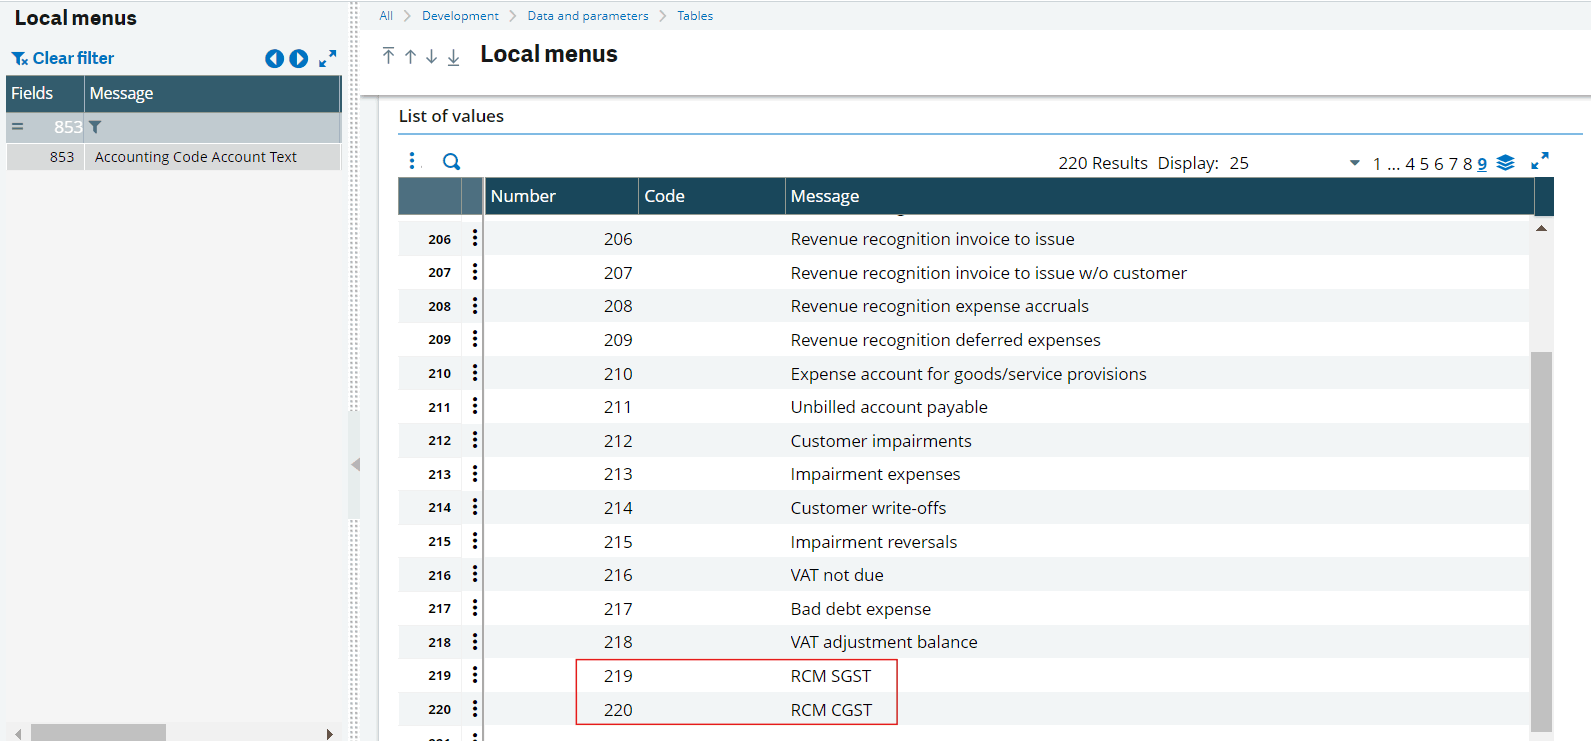
3) Updating Local Menu for RCM Tax Descriptions
Before configuring accounting codes, additional lines need to be added to properly document RCM tax categories in the accounting documents.
- Navigate to Local Menu – Messages.
- Choose Chapter 853, which is responsible for Accounting Code Account Text.
- Add two new entries:
a) RCM SGST
b) RCM CGST
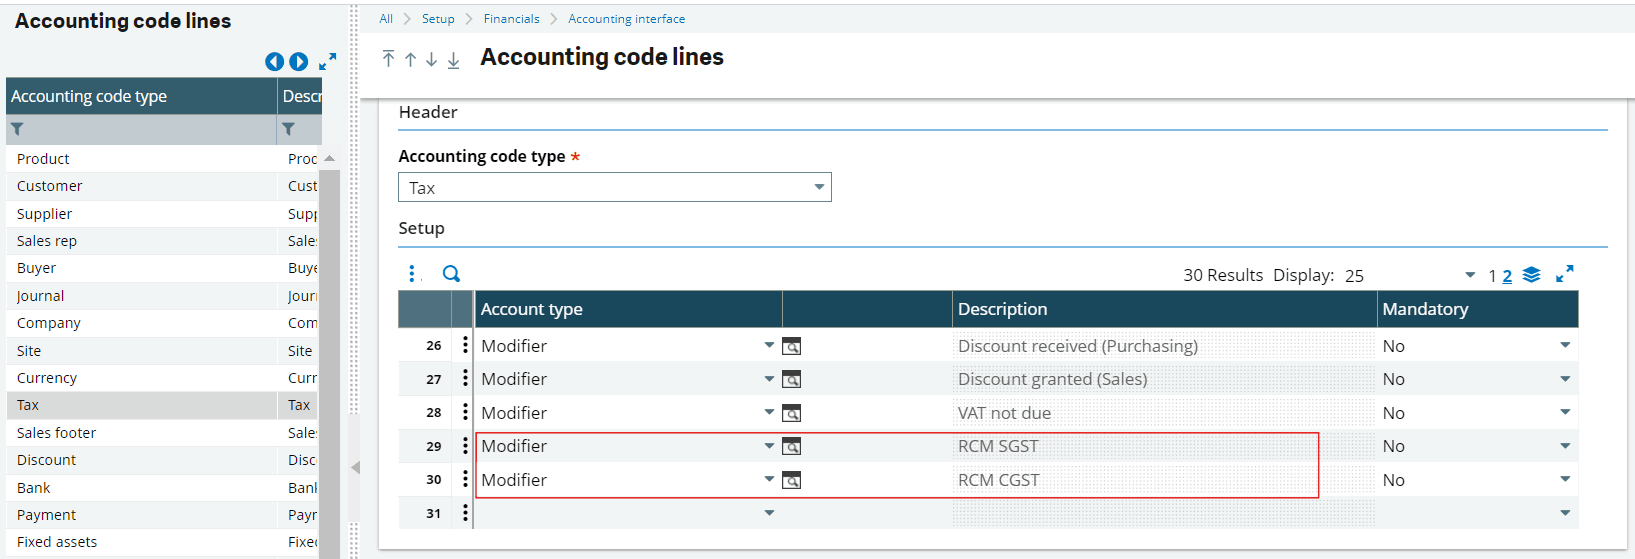
4) Configuring Accounting Code Lines
- Go to Accounting Code Lines and select Tax Type.
- Add two additional lines to the tax type setup & map the RCM SGST and RCM CGST created in the local menu.
5) Setting Up Accounting Codes for RCM Taxes
Create accounting codes for each type of tax and assign the appropriate GL accounts.
a) RSGST-PAY: RCM Payable for SGST (9%)

Similarly add the corresponding accounts in the respective accounting codes.
b) RCGST-PAY: RCM Payable for CGST (9%)
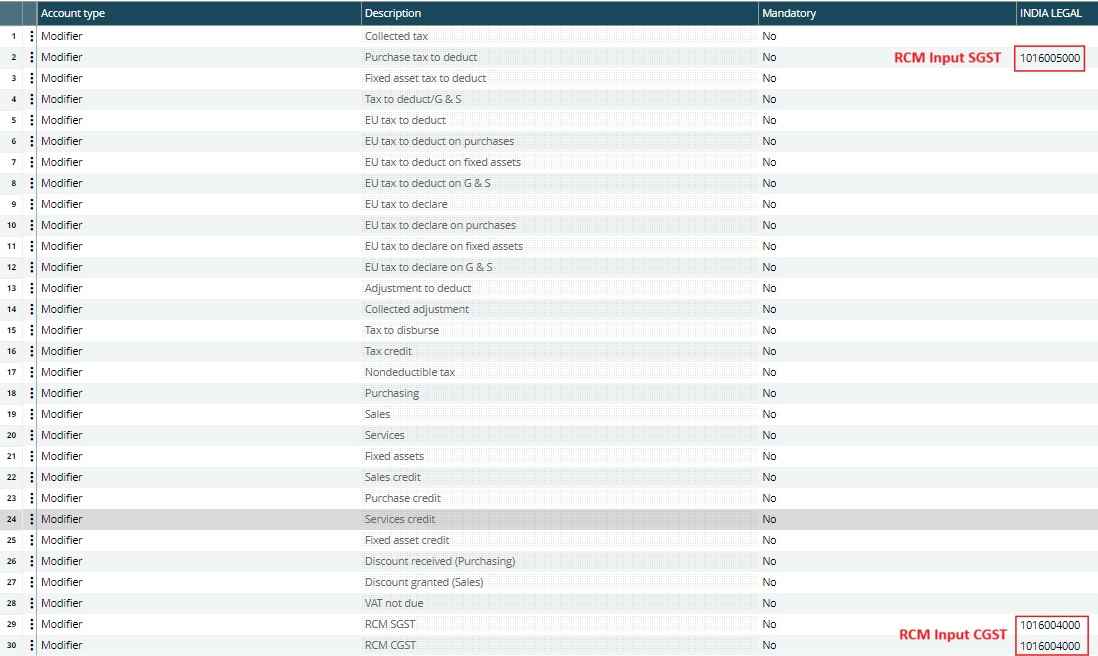
c) RSCGST-INP: RCM Input for SGST (18%) and CGST (18%)
For this, Add RCM Input SGST account in line no. 2 under Purchase Tax to Deduct, and then add RCM Input CGST account in the last two lines, i.e., under RCM SGST and RCM CGST.
d) RIGST-PAY: RCM Payable for IGST (18%)
e) RIGST-INP: RCM Input for IGST (18%)
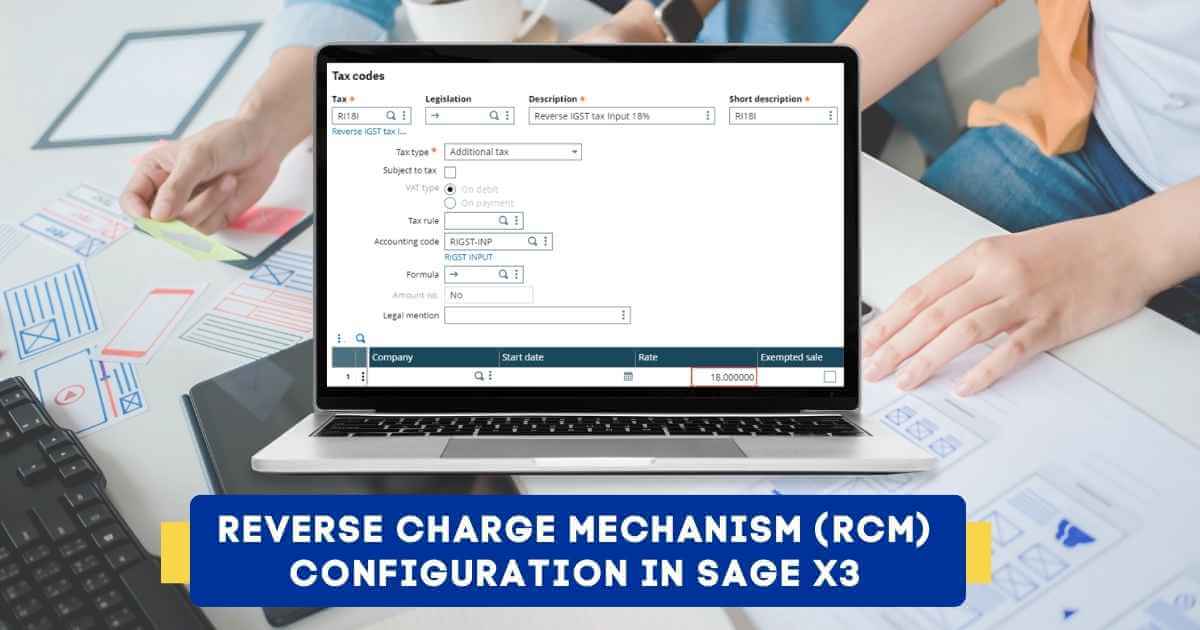
6) Setting Up Tax Rates
Next, configure tax rates based on the percentage of each tax type.
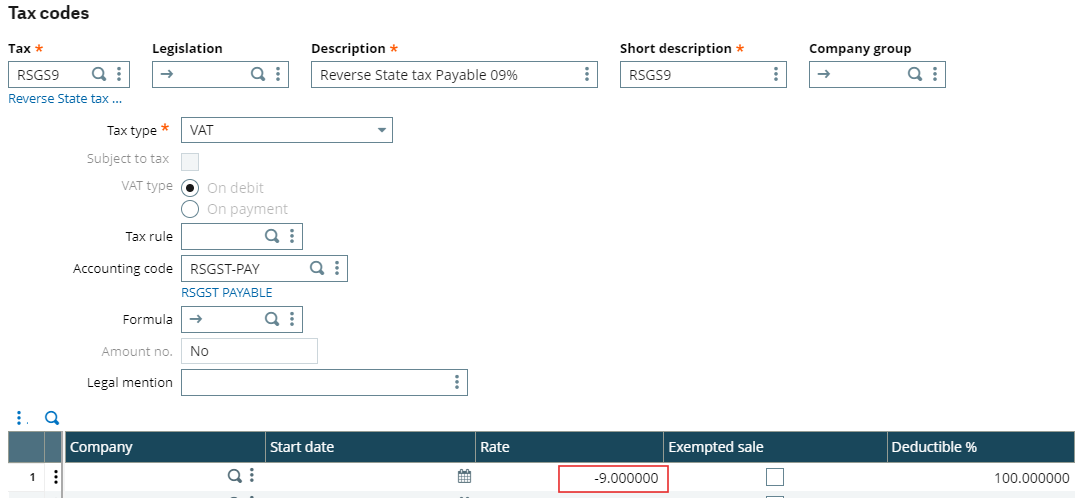
a) RSGS9: Reverse State tax Payable (09%) Rate: -9%, Accounting code: RSGST-PAY
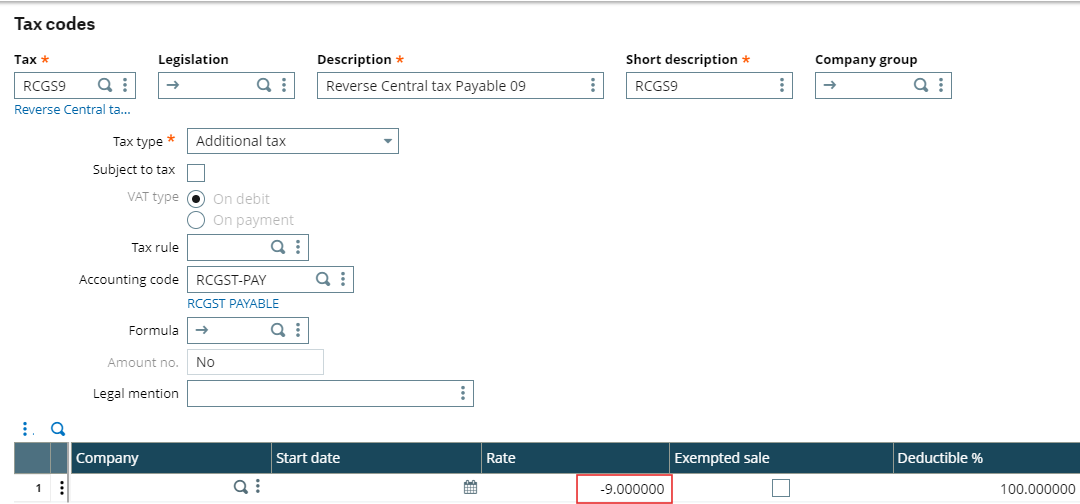
b) RCGS9: Reverse Central tax Payable (09%) Rate: -9%, Accounting code: RCGST-PAY
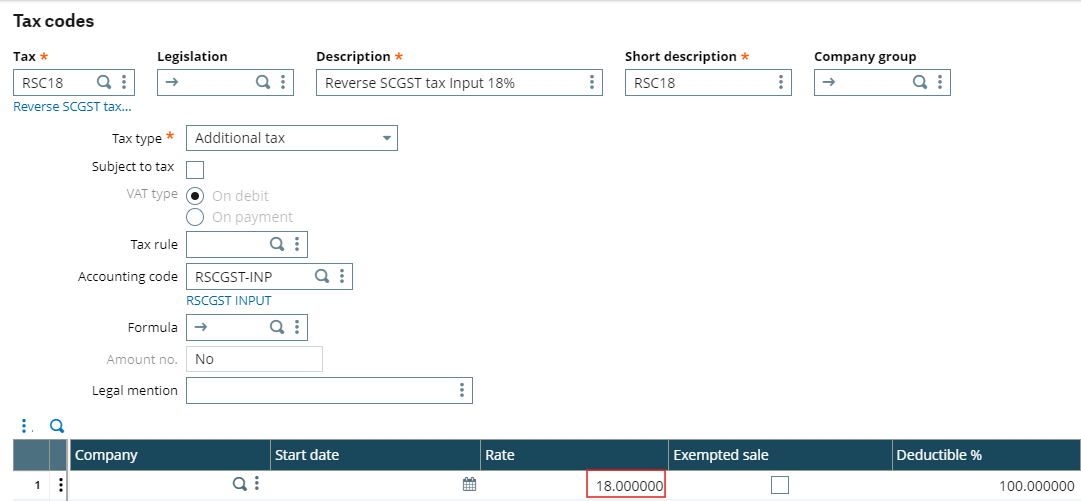
c) RSC18: Reverse SCGST tax Input (18%) Rate: 18%, Accounting code: RSCGST-INP
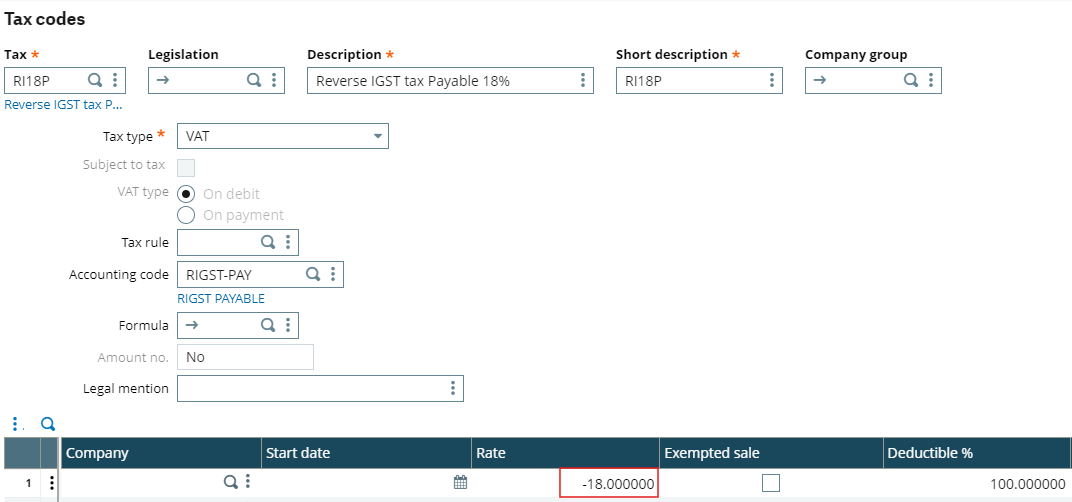
d) RI18P: Reverse IGST tax Payable (18%) Rate: -18%, Accounting code: RIGST-PAY
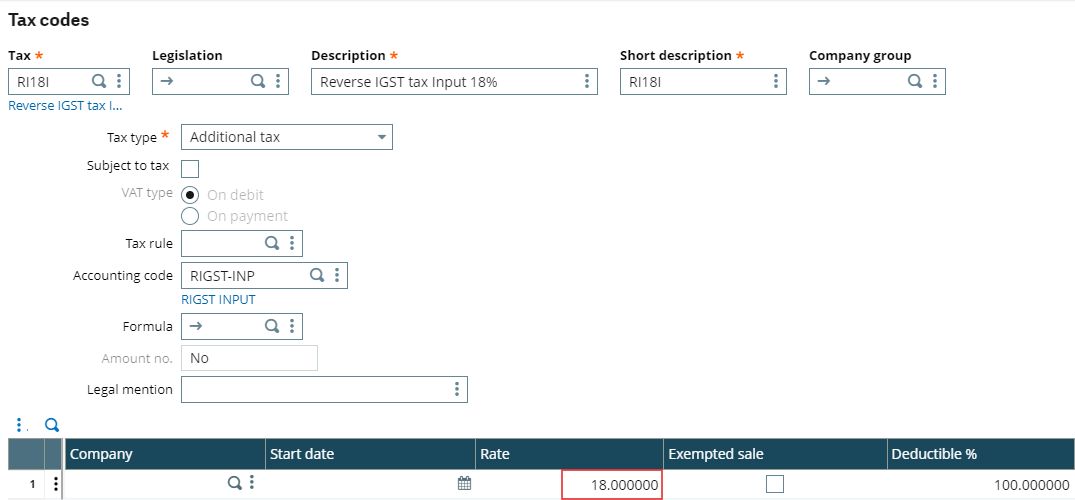
e) RI18I: Reverse IGST tax Input (18%) Rate: 18%, Accounting code: RIGST-INP
7) Configuring Tax Determination
The final step in the tax setup is to create Tax Determination rules. These determine which taxes apply based on the BP tax rule and tax levels.
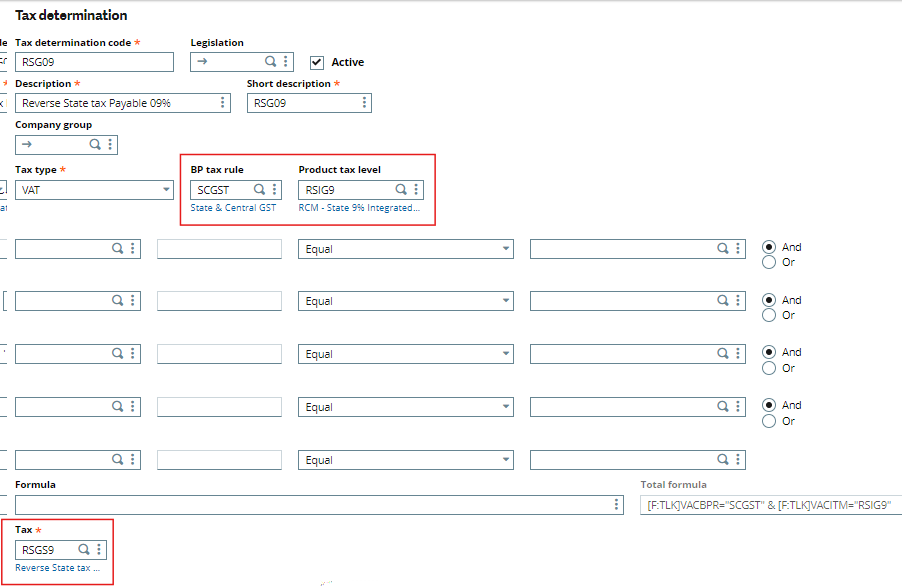
a) RSG09: Reverse State tax Payable 09%
(Type: VAT, BP tax Rule: SCGST, Tax Level: RSIS9, Tax Rate: RSGS9)
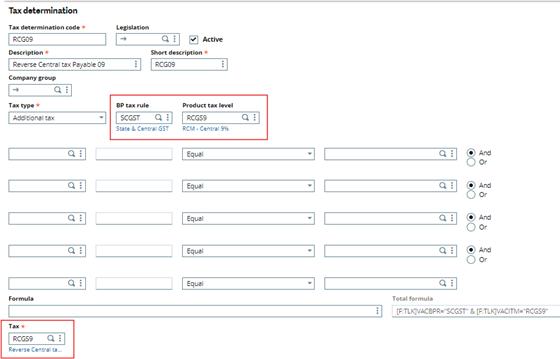
b) RCG09: Reverse Central tax Payable 09%
(Type: Additional, BP tax Rule: SCGST, Tax Level: RCGS9, Tax Rate: RCGS9)
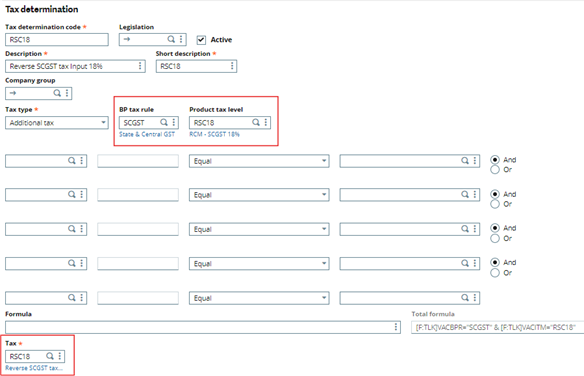
c) RSC18: Reverse SCGST tax Input 18%
(Type: Additional, BP tax Rule: SCGST, Tax Level: RSC18, Tax Rate: RSC18)
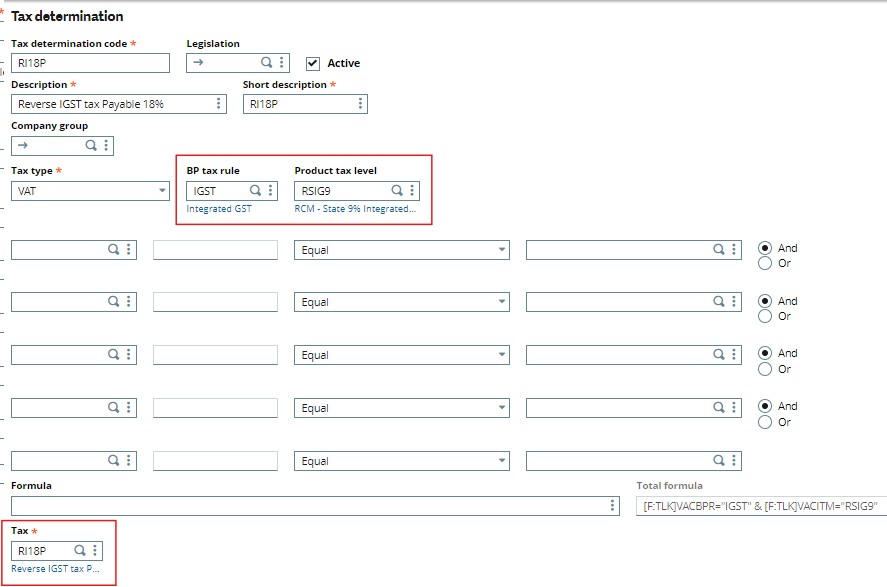
d) RI18P: Reverse IGST tax Payable 18%
(Type: VAT, BP tax Rule: IGST, Tax Level: RSIG9, Tax Rate: RI18P)
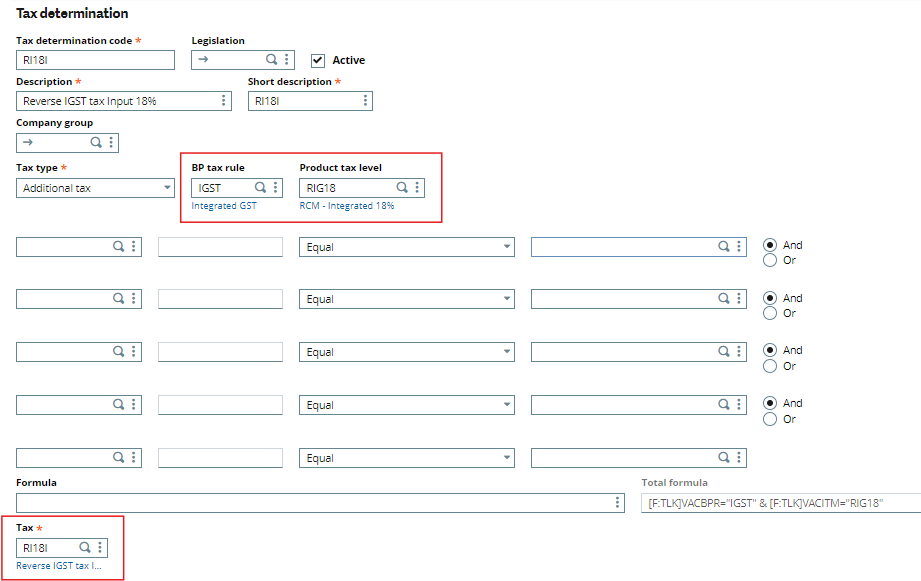
e) RI18I: Reverse IGST tax Input 18%
(Type: Additional, BP tax Rule: IGST, Tax Level: RIG18, Tax Rate: RI18I)
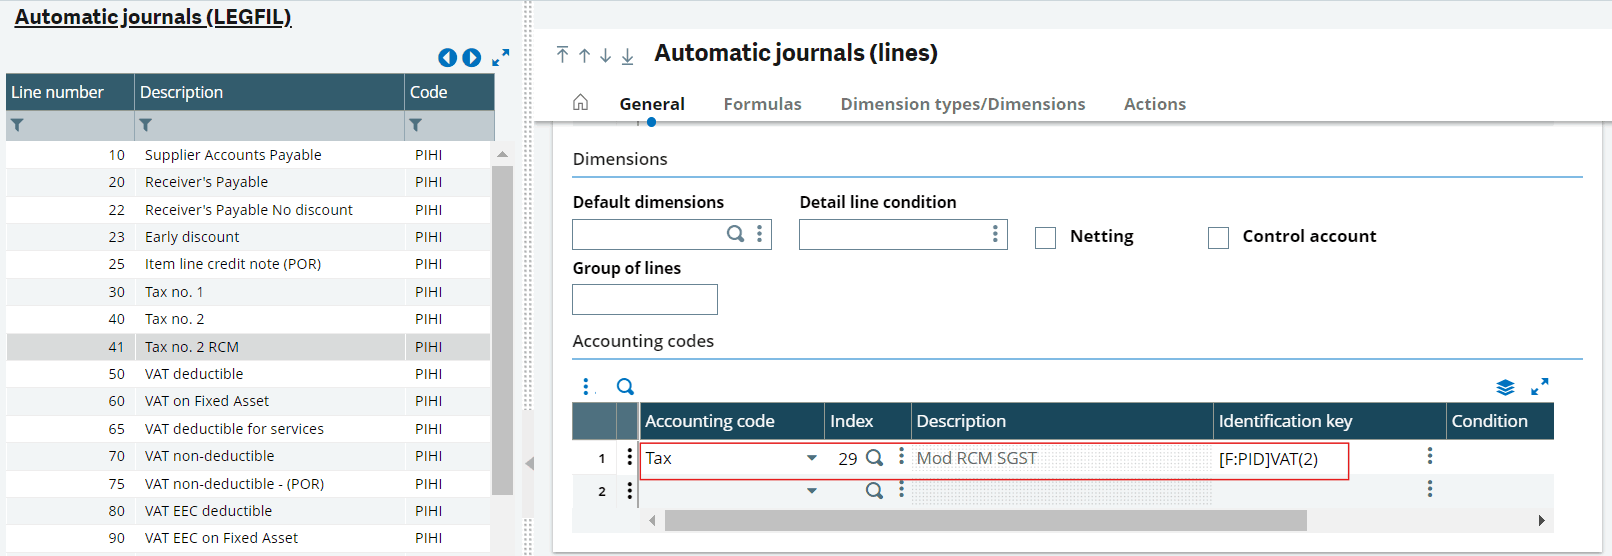
8) Additional Setup for Splitting SCGST Input
For the RCM SCGST tax (18%) to be divided into two equal parts, further configuration is required in Automatic Journals.
- Go to Automatic Journals, select PIHI, and ensure that the IND option is checked.
- In Lines, find line 40. Duplicate line 40 to create line 41 as RCM Tax.
- In the Formulas tab of line 41, add (/2) to the formula for Amount and Analytical Amount.
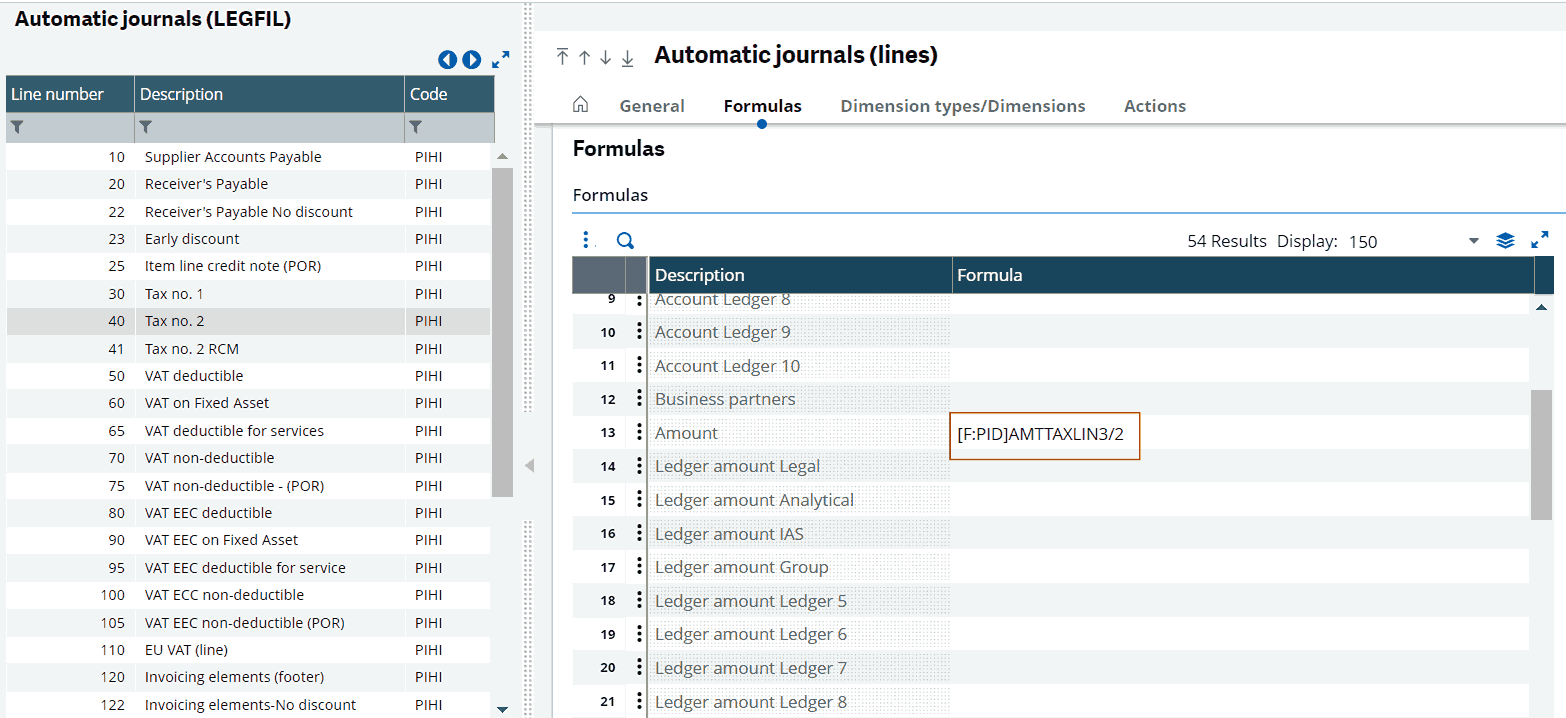
4. Now in line 41, go to accounting codes & add RCM SGST to the accounting code section.
This will complete the setup for RCM taxes in Sage X3.
Testing the Setup with Purchase Invoice:
After completing the setup, create a test Purchase Invoice:
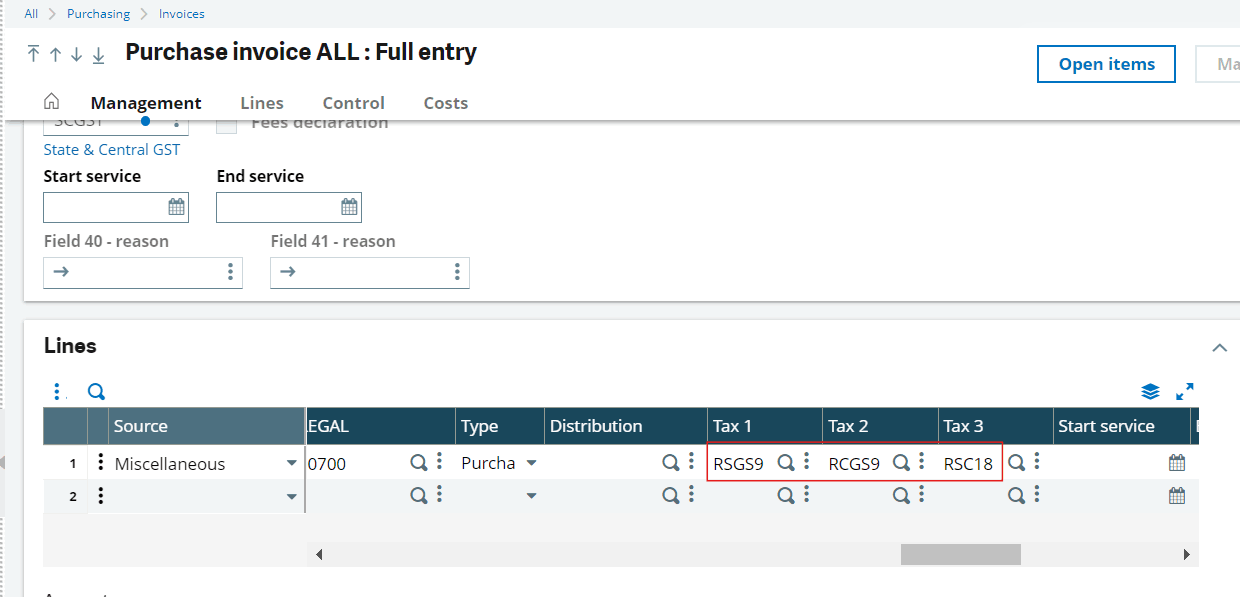
- At the line level, add the following taxes for the product:
- Tax 1: RSGS9
- Tax 2: RCGS9
- Tax 3: RSC18
- Check the Taxes section to verify the calculation:
a) RSGS9 and RCGS9 should appear as negative values (payable taxes).
b) RSC18 should be a positive value (input tax).
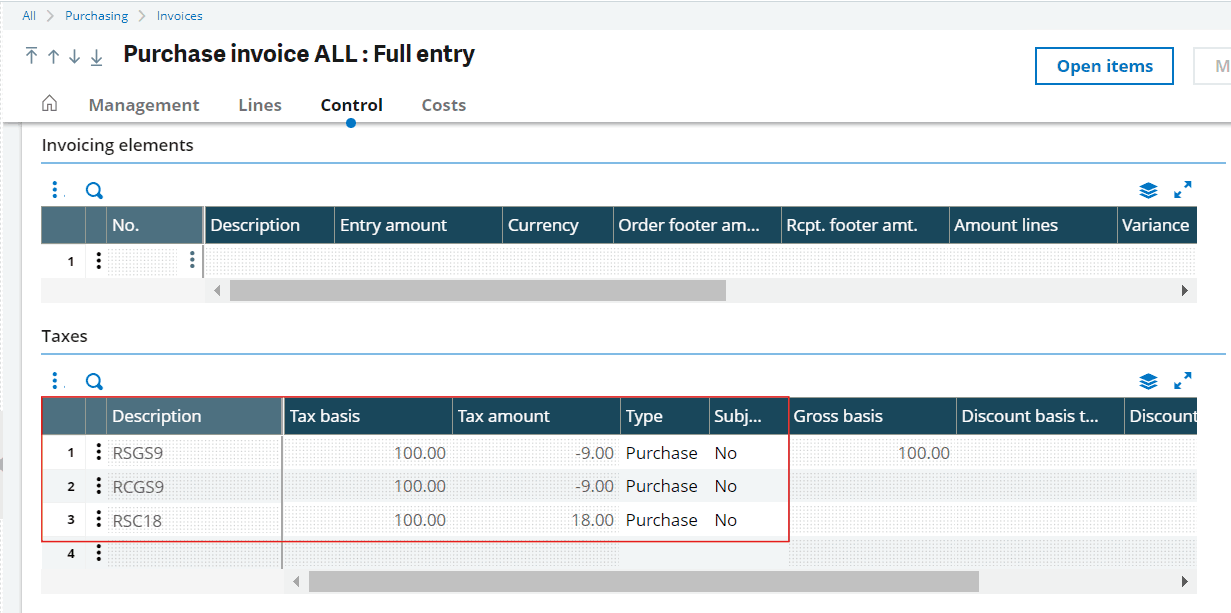
This way the total tax value on the invoice should net to zero, but the payable and input accounts will be updated with the correct amounts.
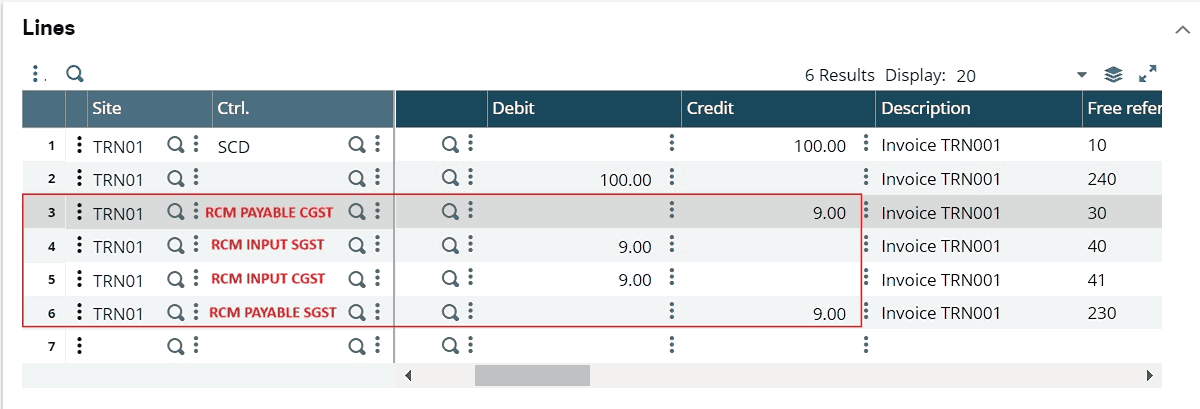
Check the Accounting Document for the invoice to confirm that the RCM taxes are debited to the Input Tax account and credited to the Payable Tax account.
Conclusion
By following the steps above, you can effectively set up RCM taxes in Sage X3, ensuring that taxes are applied, split, and posted correctly in the respective accounts.